If you’ve ever woken up to that tap-tap-tap of rain on fabric and thought, “Please don’t let my gear be soaking,” you already understand the magic of a good cover.
It’s the moment the weather turns—mid-hike, mid-fishing trip, mid-“this was supposed to be a quick picnic.” Wind shifts. Clouds drop low. Your backpack is suddenly a sponge. And the difference between a miserable hour and a calm reset often comes down to one simple piece of kit: a tough, waterproof sheet you can throw up fast.
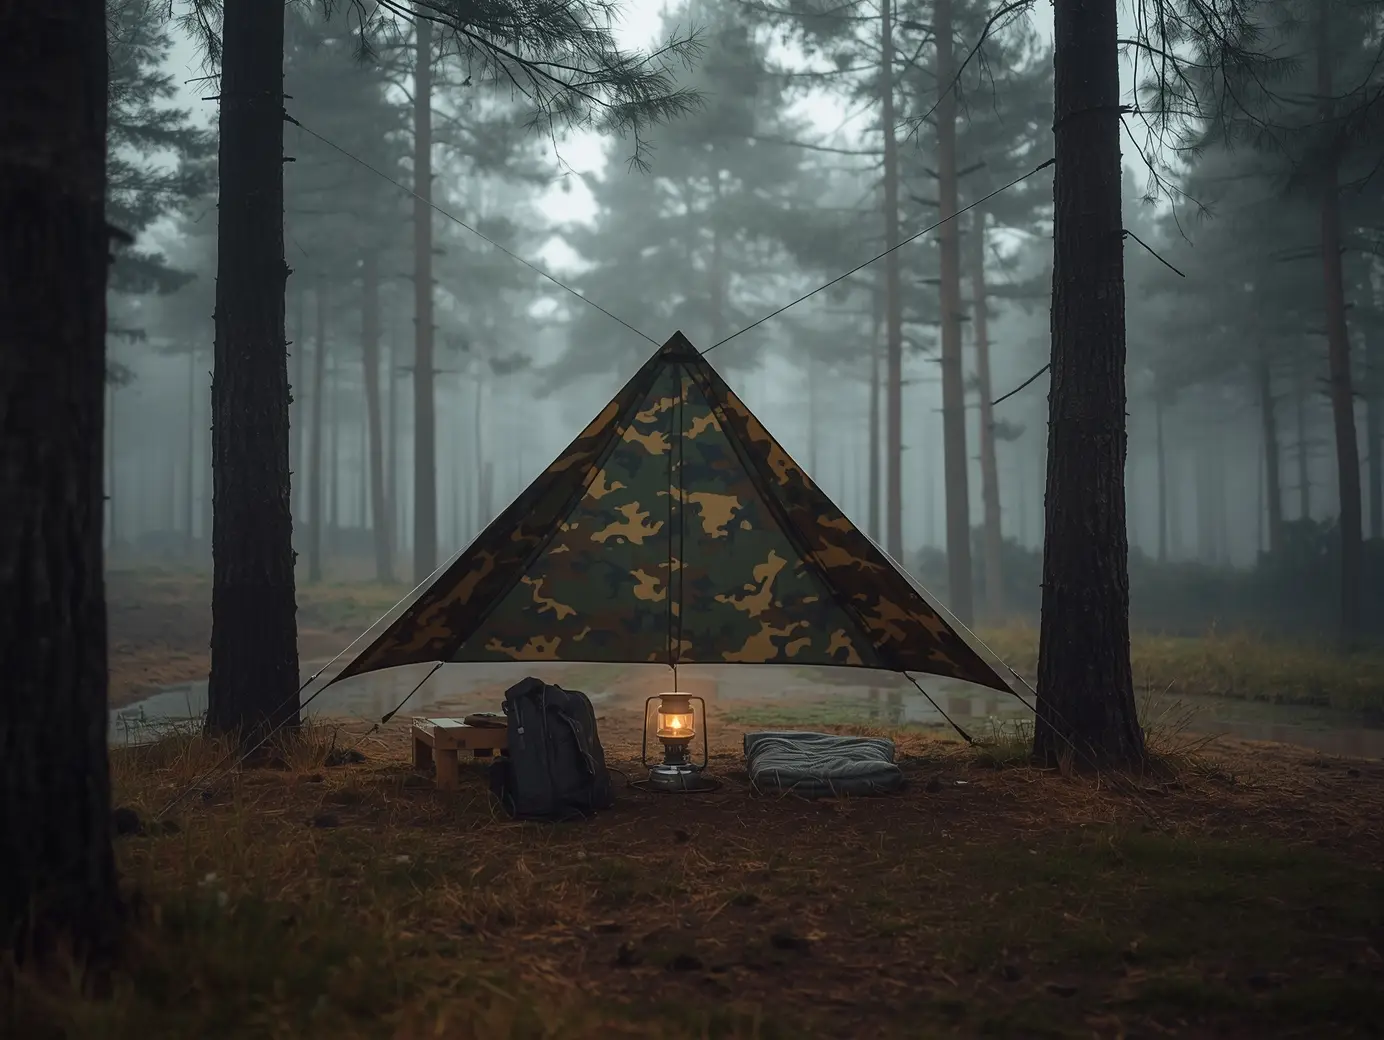
That’s where Tarnplanen comes in—practical, flexible, and surprisingly easy to make part of your routine once you know what to look for.
Tarnplanen is a camouflage-patterned tarpaulin (a durable, weather-resistant sheet) used for fast shelter, rain protection, and gear coverage outdoors. People use it because it’s versatile: it can become a quick roof, ground sheet, windbreak, or pack cover—often with reinforced tie points for secure setups in rough conditions.
Key Takeaways
- Tarnplanen = camo tarp: built to cover, protect, and blend in.
- The best ones have reinforced corners + strong grommets/tie-outs for reliable pitching.
- Choose based on material, size, seam quality, and weight—not just pattern.
- Most “tarp failures” come from bad angles, weak knots, or poor drainage, not the tarp itself.
- A little care (drying, folding, patching early) makes Tarnplanen last longer.
What Tarnplanen Is?
Let’s break it down in plain terms.
Tarnplanen is commonly used to describe camouflage tarpaulins—heavy-duty sheets designed to provide weather protection and visual blending in outdoor environments. The term is linked to German roots (“Tarn” for camouflage, “Planen” for tarpaulins/covers).
Who it’s for
Tarnplanen tends to appeal to a wide mix of people, including:
- Campers and hikers who want flexible shelter options (especially if they like tarp setups)
- Fishers and hunters who appreciate lower-visibility gear (where legal and appropriate)
- Bushcrafters and survival-minded folks who want a multi-use, rugged sheet
- Festival-goers / road-trippers who need a quick rain roof or dry sitting area
- Homeowners who want a tough cover for woodpiles, equipment, or emergency leaks
One quick note: “Tarnplanen” sometimes gets used loosely online to mean “any tough waterproof tarp.” In this guide, we’re focusing on the common outdoor-gear meaning: a camo, reinforced, weather-resistant tarp.
And since you’re here: if you want more guides like this, you can explore Scopmagazine anytime—starting with Tarnplanen.
Top Benefits
A Tarnplanen isn’t fancy. That’s the point. It’s a simple tool that earns its keep.
The biggest benefits
- Fast rain protection
Toss it over your cooking area, your packs, or your sleeping spot before everything gets damp. - Flexible shelter shapes
A-frame, lean-to, diamond pitch, low storm pitch—one sheet, lots of options. - Wind blocking
Even a partial setup can cut the wind enough to make a break comfortable. - Gear protection (not just people protection)
I’ve seen people carefully waterproof their jacket… and then leave their backpack sitting in the rain like it’s invincible. A tarp solves that in seconds. - Low-visibility footprint
Camo patterns help the tarp blend into natural backdrops—useful for low-key camps and certain outdoor activities where discretion is part of the comfort. - Multi-purpose value
Ground sheet, rain fly, sun shade, emergency stretcher-style carry (in a pinch), gear wrap—one item, many roles.
A tiny “learned-the-hard-way” moment
A simple trick I use: always pitch with a slight tilt, even when the sky looks friendly. It takes almost no extra effort—and it prevents the classic “ponding” problem where water pools and suddenly your tarp becomes a saggy waterbed.
Best Real-Life Use Cases
Here’s where Tarnplanen really shines—real situations, not marketing fantasy.
Camping: the “dry zone” maker
- Cooking tarp: Set a high ridge line between two trees and create a dry spot to boil water or prep food.
- Tent extension: Add a small overhang at your tent entrance so you can take boots off under cover.
- Ground sheet: Under a bivy or sleeping pad (just avoid sharp rocks and sticks).
Hiking: an emergency shelter that packs small
Even if you prefer a tent, a Tarnplanen can be your backup plan:
- Sudden rain + no good camp spot yet
- A longer-than-expected route
- A quick rest stop when conditions get rough
Fishing: protection that doesn’t ruin the day
- Cover a tackle area so hooks and gear stay organized
- Create shade on bright water
- Block the wind that makes hands go numb
Overlanding / car camping: “instant porch.”
Car camping is where you can go bigger:
- Tie one side to your vehicle or roof rack
- Stake the other side out to create a roomy hangout space
Emergencies: underrated household use
- Quick roof leak catch (temporary)
- Cover broken windows
- Protect furniture during sudden weather changes
- Keep supplies dry during power outages and storm cleanups
How to Choose the Right One
If you shop Tarnplanen like it’s “just a sheet,” you’ll probably end up with one that annoys you. Here’s what most people miss: your use case decides everything.
1) Material: what it’s made of matters
Common tarp materials you’ll run into:
- Polyethylene (PE): budget-friendly, decent waterproofing, can be bulky
- Polyester/nylon (coated): lighter, packs smaller, often better for hiking setups
- Canvas: tough and quiet, but heavier and can absorb water if not treated
- PVC: very durable, often heavy—better for static coverage than backpacking
No single “best” here. The best Tarnplanen is the one you’ll actually carry and use.
2) Size: don’t guess—choose with intention
A practical way to think about sizing:
- Solo shelter: enough coverage to protect you + your pack, with extra for angled rain
- Two-person: room to sleep plus a small gear zone
- Group/basecamp: big enough to cook and sit under comfortably
Tip: if you plan to pitch low in storms, you’ll “lose” usable space to the angles—so size up a bit.
3) Seams and edges: where tarps usually fail
Look for:
- Reinforced hems (strong edge stitching or bonding)
- Reinforced corners (extra layers)
- Sealed or well-constructed seams (especially on larger tarps)
4) Grommets and tie-outs: the difference between “okay” and “solid.”
A tarp is only as good as its attachment points.
- Grommets: convenient, but can tear out on cheap tarps
- Webbing loops / reinforced tie-outs: often stronger for repeated tension
- More tie points = more pitch options (and better storm performance)
5) Weight and packability: match it to your reality
Be honest:
- If you’re backpacking, weight and bulk matter a lot.
- If you’re car camping, durability and size might matter more than ounces.
Setup Tips
You don’t need fancy knots to get started. You need a simple process and a few good habits.
Step-by-step: a beginner A-frame pitch
- Pick your spot
- Avoid dips where water collects.
- Check overhead for dead branches (the “widowmaker” risk).
- Find two anchors
- Two trees are easiest. No trees? Use trekking poles plus stakes.
- Run a ridgeline
- A cord between anchors becomes your “spine.”
- Keep it taut, roughly head height for a roomy pitch.
- Drape the Tarnplanen over the line
- Center it so both sides are roughly even.
- Stake the corners
- Start with two opposite corners.
- Then stake the remaining corners, adjusting tension as you go.
- Angle for drainage
- Slight tilt beats perfectly symmetrical every time in rainy weather.
- Tension-check
- Walk around and tug gently on tie-outs.
- Re-seat stakes if the ground is soft.
A tiny “seen-it-a-lot” moment
I’ve seen people crank the tarp tight like a drum… and then it rips at the weakest grommet the moment a gust hits. Better approach: snug, not extreme, and use more tie points to distribute force.
Common Mistakes & Fixes
This is the section that saves trips.
Mistake 1: Pitching flat
Problem: Water pools and the tarp sags.
Fix: Add a tilt, or pull one side lower. Create a clean “runoff path.”
Mistake 2: Ignoring wind direction
Problem: Rain blows sideways under your shelter.
Fix: Face the open side away from the wind and pitch lower on the windward side.
Mistake 3: Relying on weak grommets alone
Problem: Grommets tear out under tension.
Fix: Use reinforced loops when possible. Add a small loop of cord (“soft shackle”) to reduce strain.
Mistake 4: Stakes popping out
Problem: Soft soil, poor stake angle, or too much tension.
Fix: Stake at a 45° angle away from the tarp, use rocks/logs as anchors, or switch to longer stakes.
Mistake 5: Setting up over sharp ground
Problem: Small punctures become big tears.
Fix: Clear sticks and stones first. For ground use, add a cheap sacrificial layer underneath.
Mistake 6: Packing it wet and forgetting
Problem: Mildew smell, stains, weakened fabric.
Fix: Dry it ASAP at home—hang it, wipe it down, and store only when fully dry.
Comparison Table
| Use Case | Why it helps | What to look for | Quick tip |
| Rain shelter at camp | Creates a dry “living zone” fast | Larger size, multiple tie-outs, strong edges | Pitch with a tilt for runoff |
| Backpack cover/gear protection | Keeps insulation and electronics dry | Lightweight material, quick attachment points | Clip/cord it before rain starts |
| Ground sheet under sleep kit | Adds a moisture barrier and keeps gear cleaner | Abrasion resistance, reinforced corners | Clear sharp debris first |
| Windbreak | Cuts the wind chill and protects the stove flame | Solid tie points, enough width | Set low and angle into the wind |
| Fishing/shore shade | Reduces glare and heat, keeps gear organized | UV resistance, stable grommets/loops | Use extra guy lines for gusts |
| Emergency cover (home/vehicle) | Temporary protection for leaks and supplies | Tough material, reliable grommets | Keep a small repair kit with it |
When Tarnplanen Is NOT the Right Choice
Honest moment: Tarnplanen is useful, but it’s not a magic shield.
Tarnplanen might not be right if…
- You want full bug protection (mosquitoes will not respect your tarp)
- You need a fully enclosed storm shelter with minimal skill (a tent is simpler)
- You camp in areas with heavy condensation issues and want a built-in system
- You prefer “set it and forget it” comfort after long hiking days
Good alternatives
- Traditional tent: best for enclosed comfort, bugs, and predictable setup
- Tarp + bug net: keeps the open-air feel while handling insects
- Bivy sack: minimal footprint and fast setup (but can feel cramped)
- Poncho tarp: ultralight, multipurpose, but usually smaller coverage
If you’re unsure, a solid approach is: tent for sleep + Tarnplanen for living space. That combo makes bad weather feel… manageable.
Safety & Care
A Tarnplanen lasts longer when you treat it like gear, not like trash-bag plastic.
Drying and storage rules that actually help
- Dry it fully before long-term storage (hang it or drape it over a line)
- Avoid sealing it wet in an airtight bag
- Store in a cool, dry place away from direct sun
Mold prevention
Mildew loves warmth + moisture + time. Your best defense:
- Air-dry as soon as you can
- If it smells musty, rinse lightly and dry thoroughly before storing
Basic repairs (simple, not fancy)
- Carry a small patch kit or strong tape suitable for your tarp material
- Patch tiny holes early—they grow when tension and wind hit
- Reinforce stressed tie points with extra cord rather than yanking harder
Checklist
Tarnplanen Quick Checklist
Size matches my main use (solo / 2-person / group)
Material fits my carry style (backpacking vs car camping)
Reinforced corners + strong edges (no flimsy hems)
Multiple tie-outs (not just 4 corners)
Grommets/loops look solid and evenly spaced
I have: cord + 4–8 stakes + a simple repair patch/tape
I can pitch one basic setup (A-frame or lean-to) confidently
I dry it fully before storing
FAQ
1) What is Tarnplanen used for?
Tarnplanen is used as a weather-resistant cover for shelter, gear protection, and wind or sun blocking. Many people also use it as a ground sheet or an emergency cover when conditions change quickly.
2) Is it waterproof or just water-resistant?
It depends on the material and construction. Many Tarnplanen-style tarps are designed to handle rain well, but seam quality, coatings, and wear over time make a difference—especially in heavy, windy rain.
3) How do I choose the right Tarnplanen size for camping?
Pick a size that covers your sleeping area plus your pack, with extra space for angled rain. If you expect storms or want room to cook/sit under, sizing up is usually worth it.
4) What’s better: grommets or fabric loops?
Loops and reinforced tie-outs often handle repeated tension better, while grommets can be quick and convenient. If you’ll pitch in wind often, prioritize strong reinforcement around attachment points.
5) Can I use Tarnplanen as a tent footprint?
Yes—many people do. Just clear sharp debris first, and avoid dragging it over rocks. A slightly tougher material helps if ground use is a regular thing.
6) How do I stop water pooling on my tarp?
Pitch with a tilt and create a clear runoff direction. Add an extra tie-out point if needed to form a ridge or “channel” so water doesn’t settle in the middle.
7) Is Tarnplanen good for hiking and backpacking?
It can be, especially if you choose a lighter, packable version. If your Tarnplanen is heavy or bulky, it may be better suited to car camping or basecamp setups.
8) How should I store Tarnplanen to prevent mildew?
Dry it completely first, then store it in a breathable bag or loosely folded in a dry place. Packing it wet and forgetting it is the fastest route to funky smells and fabric damage.
Conclusion
A good Tarnplanen is one of those quiet pieces of gear that earns trust the moment the weather turns. It doesn’t need batteries. It doesn’t need “updates.” It just needs decent tie points, smart setup, and a little care afterward.
If you’ve been relying on luck (or stuffing your jacket over your backpack like a sad little hat), consider this your nudge: learn one simple pitch, pack a bit of cord, and give yourself a dry zone when it matters.